
Have you ever noticed your car’s headlights looking cloudy, yellow, or dull? It is not just an eyesore; it is a serious safety hazard that makes night driving much more dangerous. Over time, the sun’s harsh UV rays break down the protective coating on your lenses, turning crystal-clear plastic into a foggy mess that blocks your view of the road.
Choosing the best way to fix this can feel overwhelming. You might feel frustrated by the endless sea of DIY kits, expensive professional services, and conflicting advice online. Many people waste money on products that offer only a temporary fix, leaving their lights looking hazy again after just a few weeks. You deserve a solution that actually lasts without requiring a trip to an expensive mechanic.
In this guide, we will break down the most effective methods to restore your headlights to a factory-fresh shine. You will learn which tools work best, how to avoid common mistakes, and how to protect your lenses so they stay clear for years. We have gathered the best tips to save you time, money, and stress.
Ready to get your car looking sharp and driving safely again? Let’s dive into the simple steps you need to polish your headlights like a pro.
Top Way To Polish Headlights Recommendations

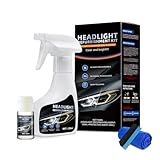
- KIT CONTENTS - Each headlight restoration kit includes (8) Step 1 Oxidation Removing Wipes, (1) Step 2 Sanding Kit, and (2) Step 3 Ceramic Coating Wipes.
- LASTS AS LONG AS YOU OWN YOUR VEHICLE! - This is a CERAMIC coating for cars that chemically bonds to your headlights and provides UV protection for as long as you'll own your vehicle.
- NO POWER TOOLS REQUIRED - Everything is included in the kit for your car. There are no tools required that could potentially damage your headlights or paint.
- RESTORES AND PROTECTS FROM UV! - Our CERAMIC coating wipes provide a layer of UV protection that will last as long as you own your vehicle. We believe in providing our customers the best products on earth, the first time.
- 3 EASY STEPS! - Cerakote's Headlight Restoration Kit is a simple, 30 minute process. Step 1: Our Oxidation Remover wipes remove stubborn oxidation. Step 2: Using our supplied sanding materials, remove any remaining deep oxidation. Step 3: Cerakote's industry leading ceramic restores the headlight to like-new!

- Cleans and Seals: Instantly clear the cloudy, dull, and yellowed headlights of your vehicle with Formula 1 Headlight Restorer and Sealant. Our headlight renewal polish protects against oxidation, weathering, and UV rays all in one easy step.
- Improved Visibility: Formula 1 Headlight Restorer doesn't just improve your car's appearance. It also enhances visibility for a safer driving experience at night. Quickly renew your hazy headlights to achieve like-new clarity.
- Versatile Use: Not just for headlights; use Formula 1 to clean cloudy brake lights, turn signals, helmet visors, motorcycle windscreens, marine windows, and other clear plastics!
- One-Step Process: No need to tape off paint, use aggressive sandpaper, or borrow expensive tools. With Formula 1 Headlight Restorer, all you need is our liquid plastic polish and a clean microfber towel.
- How to Use: Wash and dry area to remove dirt. Shake well before applying with a dry cloth using circular motions. Fold towel to avoid reusing soiled portion and buff away excess product. Extremely oxidized surfaces may require a second application

- Easy 3 Steps: Wash lens for free of dust or dirt. Step 1: Wet sanding lights with souring pads, P1000, P3000, P5000 discs. Step 2: Polish it with foam pad and compound. Wash it and wipe dry. Step 3: Seal with UV block coat. Enjoy crystal-clear results
- Restores Headlight: Provide a deep clean to heavy yellowed, cloudy, dull and hazed lenses. Remove haze, oxidation, cloudiness and corrosion. Restore the clarity and shine to see down-road at night. Enhance visibility and safety for night driving
- Save More: POLIWELL headlights restore kit easy to store and enough to restore about 2 lenses. Designed for use on headlights, taillights, fog lights, directional lights and more. Instructions were clear printed on the packaging
- Professional Results: With a common household drill, it is easy to restore the heavy cloudy and scratchs in your headlights. Maintain and protect all types of smooth, shiny plastic and acrylic headlights
- Excellent Diy Set: 2 pcs 3 in 800 grit scrubber pads, 4 pcs each of 1000, 3000 and 5000 grit sanding discs, back-up sanding pad, drill attachment, soft sponge interface pad, 10 meter masking tape, spray bottle, polishing compound and UV coating
- Make Your Vision Brighter:This New Automotive Headlight Restoration Kits effectively clears up yellowing and cloudiness, shine your car headlamp in just minutes, instantly improving brightness and visibility
- Fast-Acting: This instant headlight oxidation removal spray works in minutes. This headlight cleaning kit quickly and easily resolves cloudy or yellowed headlights, saving you time
- Easy to Use: Simply shake 120ml of headlight restoration fluid, spray on your headlights, and wipe with a microfiber towel. No special tools or complicated steps are required, making this headlight repair kit easy for everyone
- Wide Compatibility: This headlight cleaning kit is suitable for both plastic and glass lenses on a variety of vehicle models, ensuring versatility for daily maintenance. This universal headlight restoration kit, suitable for all vehicle models, is a great addition to any car maintenance routine
- Lnstructions For Use: Step 1-Cleaning: Evenly spray the cleaner onto the headlight surface. Let it sit for 30 seconds, then wipe with a clean towel. Step 2-Rinsing: Thoroughly rinsse the headlight surface with clean water to remove all cleaner, then use a dry cloth to wipe away any water spots. Step3-Restoration: Squeeze an appropriate amount of crystal coating liquid onto the sponge applicator, wipe the headlight surface carefully in one direction to complete restoration.( Tip: when applying the coating liquid, do not scrub back and forth. Complete the wiping in a single pass in the same direction to protect the coating layer.)

- CLEAR LIGHTS: Meguiar's Clear Headlight Coating is the ultimate solution to maintain exceptional optical clarity on both new and restored headlights, ensuring optimal visibility and safety during nighttime driving
- UNIQUE FORMULA: With our proprietary formula, in your car care kit, your headlights are shielded with a durable layer of UV protection. This technology safeguards against the effects of sunlight, preventing hazing, yellowing, and discoloration.
- A NEW LOOK: Preserve the appearance of your new headlights with Meguiar's Keep Clear Headlight Coating. Our formula works to keep your headlights looking like they just rolled off the assembly line, restoring the overall aesthetics of your vehicle.
- LASTS ALL YEAR LONG: Enjoy long-lasting clarity with Meguiar's Keep Clear Headlight Coating. Our high-performance formula provides exceptional durability, offering headlight clarity that can withstand the test of time for up to a year.
- EASY TO USE: Experience convenience at its finest with the aerosol spray application of Meguiar's Keep Clear Headlight Coating. Just spray, let it dry, and enjoy the benefits of crystal-clear headlights that enhance the experience of your vehicle.

- HEADLIGHT RESTORATION: Effectively removes oxidation, yellowing, and cloudiness to restore clarity.
- POLISHING SPRAY: Easy-to-apply formula cleans and polishes headlights for a like-new finish.
- OXIDATION REMOVER: Targets built-up grime and oxidation that dims headlight output over time.
- MULTIFUNCTIONAL USE: Suitable for a wide range of vehicle headlights, taillights, and plastic lenses.
- VEHICLE MAINTENANCE: Regular use helps extend headlight life and improves nighttime visibility.

- Improve Visibility: The Atomizing Cup car headlight repair kit with 100 ml of repair fluid. It can effectively solve the yellowing, blurring, slight scratches, and dim areas of the headlights, ensure that the headlight lenses are clear, and improve the visibility of the headlights. If you have any questions, We will reply within 24 hours and strive to achieve your satisfaction
- High Quality and Efficient: Atomizing Cup,100 ml blue ice restoration liquid. Stainless steel coating solution, fast heating repair with vapor, good effect. Helps protect from UV rays and future yellowing or discoloration. No need to replace the headlight, Cost Savings
- Easy to Use: Simple operation, no complicated steps to restore the brightness of the headlight. With 6 grades of sandpaper, for proper gradual sanding. Restores cloudy and dull lenses. It has the characteristics of high transparency and strong adhesion.Notice: The amount of repair solution poured into the cup should not exceed 50ml, otherwise it will slow down the heating speed. If the heating speed is too slow, you can shake the liquid in the cup, which will accelerate the heating speed. Please be careful when shaking to prevent burns
- Widely Used: The headlight scratch repair kit is complete with accessories, used to repair and clean the headlights, solve problems such as yellowing, blurring, oxidation and polishing. It can also help extend the life of car headlights and delay their aging. The application is for motor vehicles, electric vehicles, motorcycles, etc
- Fully Configured: Includes coated atomized steel cup, 100 ml repair solution, 6 x sandpaper, plastic the cup lid, car power adapter. Perfect for meeting your daily needs at work

- Instructions for Use: The first yellow drill attachment installed on the drill, cushion pad white surface and drill attachment black surface paste, use the first in the lamps on the spray water and then use the cleaning pad to dry in a circle, and then according to the grain size from small to large in order to use the waterproof abrasive disc on the lamps for polishing, and finally use the sponge polishing pad for polishing
- Enhance Visibility: Car headlight cleaning tool clean the fuzzy yellowed headlights, make them restore the same crystal clear as the new car, improve the visibility and safety when driving at night or in bad weather
- Velcro Self-adhesive Design & High Quality Material: Velcro self-adhesive design for automotive headlight polishing kits removable kits over and over again, more convenient to use, can quickly replace other accessories, the package contains high quality sandpaper, even if you manually sanding can get good results
- Suitable for All Types of Lights: Car headlight restoration kit suitable for all types of lights, whether it is headlights, taillights, fog lights, or plastic, glass and acrylic can be used
- Packing List: 3 inches 1000, 2000, 3000 high-precision waterproof grinding wheel each 4 pieces, 3 inches 320 400 600 purple sanding disc each 4 pieces, 7 pieces 3 inches 800 purple sanding disc, 4 pcs of cleaning pad, 1 polishing sponge pad, 1 drill attachment, 1 buffer pad
The Ultimate Guide to Restoring Your Headlights
Cloudy or yellow headlights can make your car look old. They also make it hard to see the road at night. You do not need to buy expensive new lights. A simple headlight restoration kit can make them look brand new again. This guide helps you choose the right product for your car.
Key Features to Look For
When you shop for a kit, look for these important features:
- UV Protection: Good kits include a sealant. This keeps the sun from turning your lights yellow again.
- Drill Compatibility: Some kits attach to a power drill. This makes the job much faster and easier.
- Multi-Step Sanding: Look for kits with different grit levels of sandpaper. You start with rough paper and finish with smooth paper for a clear shine.
- Complete Sets: Choose a kit that includes tape, polish, and cloths. You will not have to buy extra tools.
Important Materials
Most kits use a few basic materials to get the job done. You will usually find wet/dry sandpaper pads in the box. These help remove the outer layer of oxidation. You will also need a polishing compound. This liquid smooths out tiny scratches. Finally, a UV-blocking clear coat is vital. This layer seals the plastic and protects it from the weather.
Factors That Improve or Reduce Quality
The quality of your result depends on a few things. First, patience is key. If you skip a step, the lights will stay cloudy. Second, the type of plastic matters. Some older cars have very thick layers of damage. These might need more sanding time. Using the right amount of water while sanding also improves the finish. If you work while the plastic is dry, you might create deep scratches.
User Experience and Use Cases
Most people find that headlight restoration is a fun DIY project. It takes about one hour to finish both lights. You should use masking tape to protect your car’s paint before you start. This prevents the sandpaper from scratching the metal. If your headlights are only slightly hazy, a simple polish might work. If they are deeply yellow and cracked, you will need a full sanding kit.
10 Frequently Asked Questions
Q: How long does the restoration last?
A: Most kits last for one to two years if you apply the UV sealant correctly.
Q: Can I do this by hand?
A: Yes, but it takes more time and effort than using a power drill.
Q: Will this work on all types of headlights?
A: Yes, these kits work on almost all plastic headlight lenses.
Q: Do I need to remove the headlights from the car?
A: No, you can clean them while they are still on the car.
Q: What happens if I get polish on my car paint?
A: Wipe it off quickly with a damp cloth. It should not cause damage if you act fast.
Q: Why do headlights turn yellow?
A: The sun’s UV rays break down the protective coating on the plastic lens.
Q: Should I use water while sanding?
A: Yes, always use water to keep the sandpaper clean and prevent deep scratches.
Q: How do I know when to stop sanding?
A: Stop when the plastic looks smooth and uniform. The cloudy yellow look should be gone.
Q: Is it better to buy a cheap kit or an expensive one?
A: Expensive kits often have better UV sealants that last much longer.
Q: Can I drive immediately after finishing?
A: Yes, but let the clear coat dry for at least an hour before driving in the rain.